Tag: VMware

I passed the VCA

I am officially a VMware Certified Associate  in Data Center Virtualization (VCA-DCV)!

VCA-DCV-sm

Last week I attended the VMware vSphere: Optimize and Scale (5.1) class at New Horizons and after hearing from a few of the attendees that the exam was a cinch if you worked with VMware and you sat through the online VMware Data Center Virtualization Fundamentals e-learning course, you could pass the VMware Certified Associate (VCA) exam with no problem. After watching the video, reading the exam blueprint, VMware vSphere Basics guide, and taking the practice exam twice, I was ready to schedule.

There is no class prerequisite to take the VCA like the VCP5 and such!

The test is administered by Pearsons Vue and you must request authorization from VMware first to schedule your exam.  There is a PDF that outlines the exam registration procedure in great detail. Once you’re registered, signed up with Pearsons and pay for your exam ($120) you’re ready to go. There are tons of discount codes out there that will either give you a 50% discount or maybe even a freebie. Check the VCA forums and see which one works.

The test was 50 questions, 75 minutes long and for but a few questions, they come straight from the e-learning course. My advice, read the question, re-read it and focus on the sentence in the middle that gives you the most clues about what the answer may be. Did I say READ the question?  To pass, you need to score a 300. The scale is 100-500 and I got a 420.

My next stop is to study for the VMware Certified Professional 5 – Data Center Virtualization (VCP5-DCV) exam. To obtain this one, you must have taken qualifying coursework prior to obtaining your certification. In the meantime, I’ll take the VMware Certified Associate – Cloud (VCA-Cloud) & VMware Certified Associate – Workforce Mobility (VCA-WM) as well.

I’ll post my training plan and will let you know of my progress. Good luck to you if you’re on the path to becoming VMware certified.

Configure and Install the Multipath Extension Module for vSphere and EqualLogic

The MEM (Multipath Extension Module)  by EqualLogic (EQL) handles path selection and load balancing to the storage array. Upon install, it will add another path selection policy called ‘dell_psp_eql_routed’ in addition to the 3 default policies. Using this PSP is ideal when you’re datastores reside on EQL since the module is written by EQL, it has been designed to perform more efficiently in regards to path selection and load balancing to the array.

Here is how I installed and configured MEM on my esxi hosts. I’m running ESXi 5.1 Update 1 with vSphere CLI installed on vCenter.

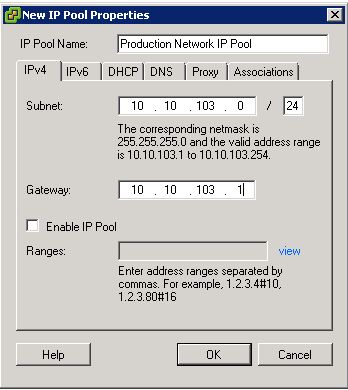
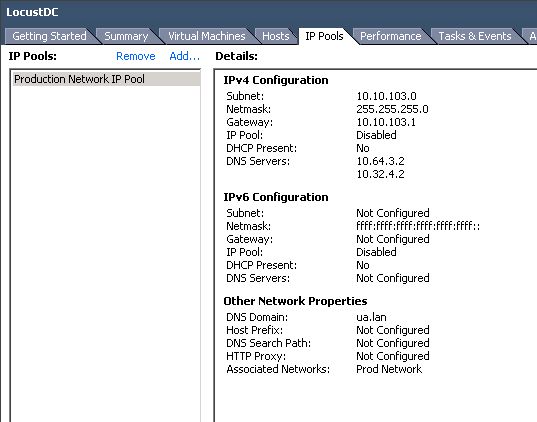
Prerequisite: Be sure to configure an iSCSI vSwitch for multipathing before installing MEM. Please read  TR1075 for more information on how to configure the vSwitch.

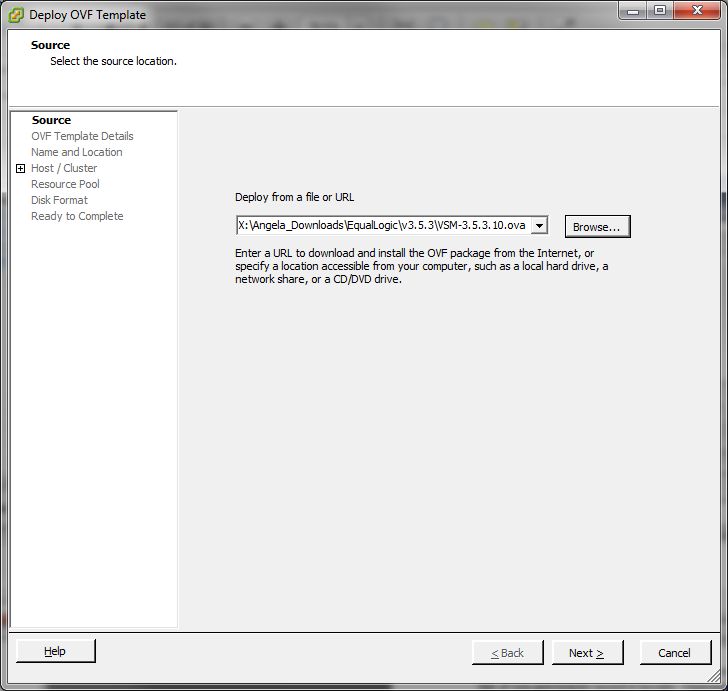
Download MEM from EQL support site. Login is required. Review the release notes, TR1074 as well as the installation & user guide before proceeding.

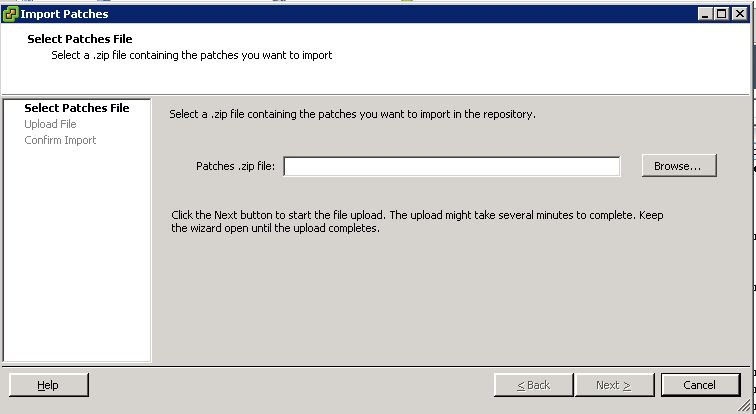
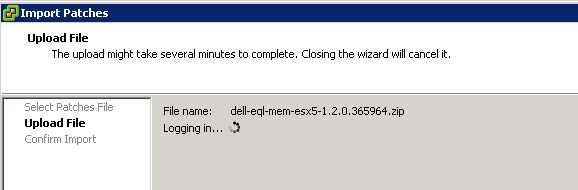
On the vCenter server,  launch vCenter client. From the home screen, open Update Manager and click on the patch repository tab. Click import patches and browse to the MEM offline bundle zip  and click next to upload.

import-mem-offline-bundle

browse-mem

upload-mem

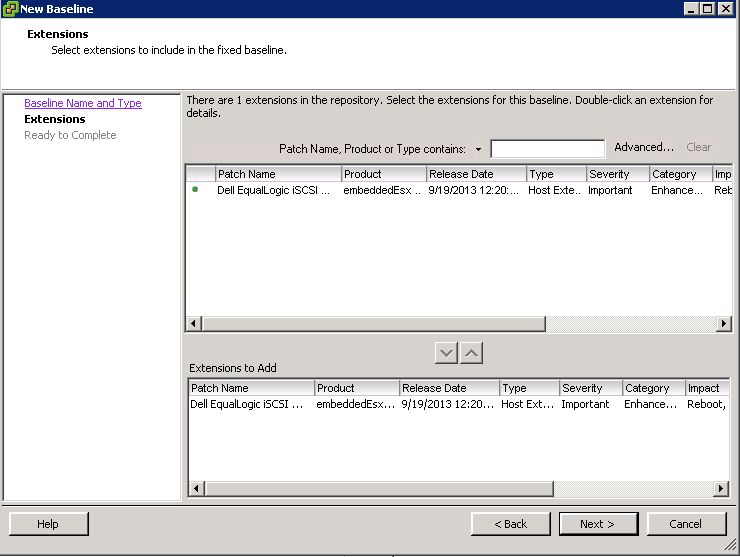
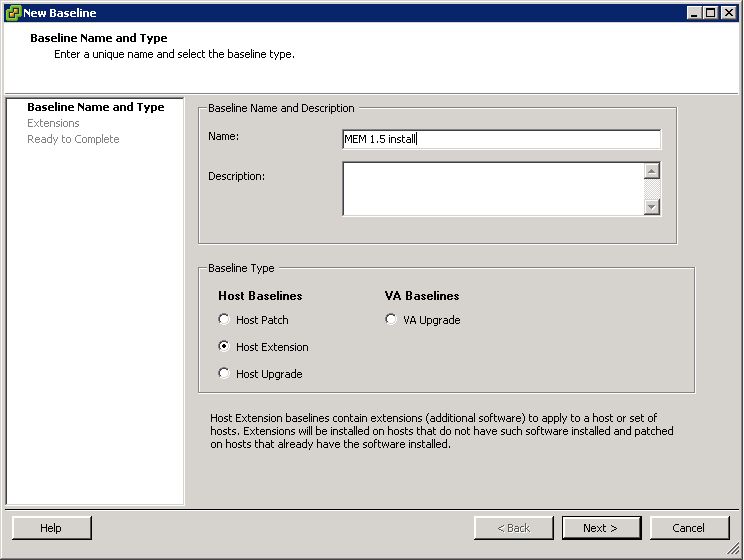
Next, create a baseline. Enter a name and description for your new baseline, select ‘Host Extension’ then click next.

newbaseline1

Add the extension to the baseline. Click next.

newbaseline2

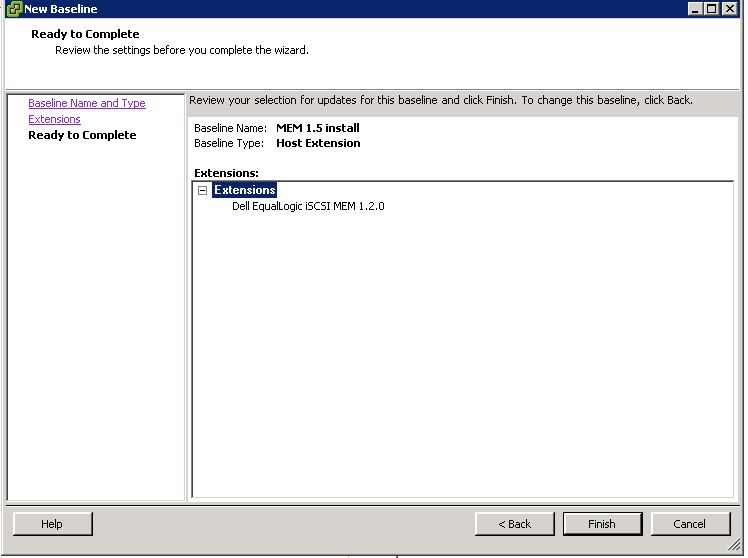
Review your  setting and click finish.

newbaseline3

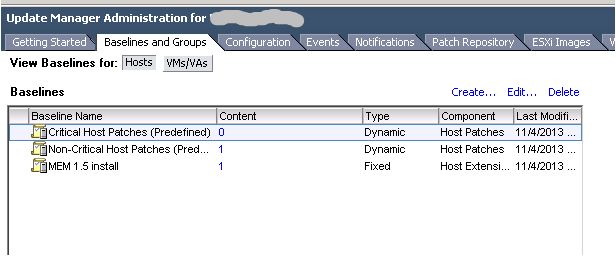
Your newly created baseline is now listed under the Baselines and Groups tab.

baseline-and-groups

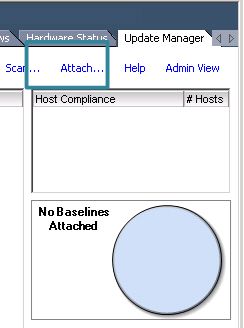
Now it’s time to install. Begin by putting your host into maintenance mode.Click the update manager tab of the host and click attach.

attachbaseline

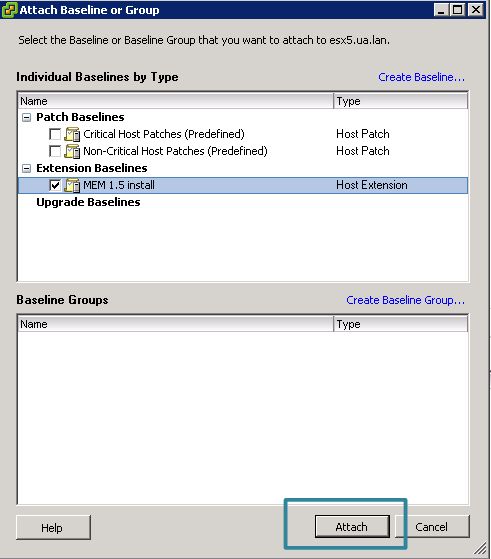
Check the box next to the MEM install and click attach.

attachbaseline2

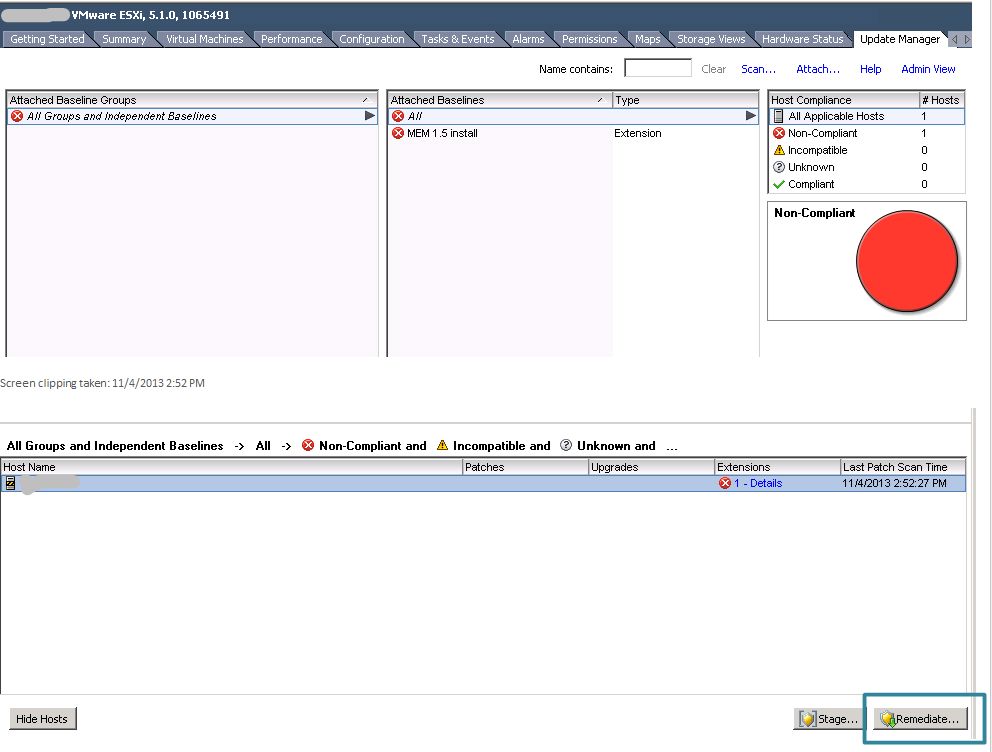
Highlight the attached baseline and click scan.
scanhost

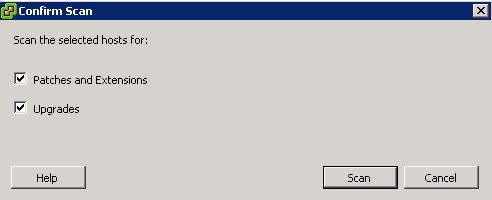
Confirm that you’re scanning for patches and extensions. Remove the check next to upgrades. Click scan.

confirmscan

The host will now be labeled as non-compliant. Click remediate in the lower right corner.

remediate

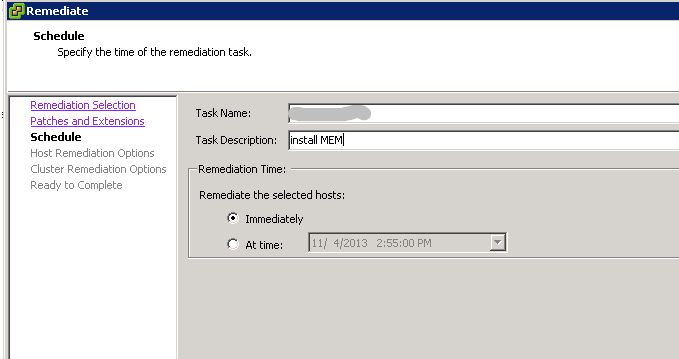
Click next twice in the remediate wizard if you’re accepting the defaults. On the schedule window, type in a new task name and description (optional) and select a remediation time. I did mine immediately, but this task can be scheduled for a later time. Click next.

remediate-sched

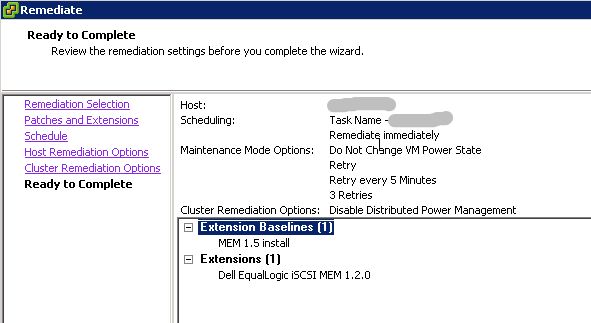
Edit any host remediation options and click next. Edit any cluster remediation options and click next. Review your remediation settings and click finish.

review-remediate

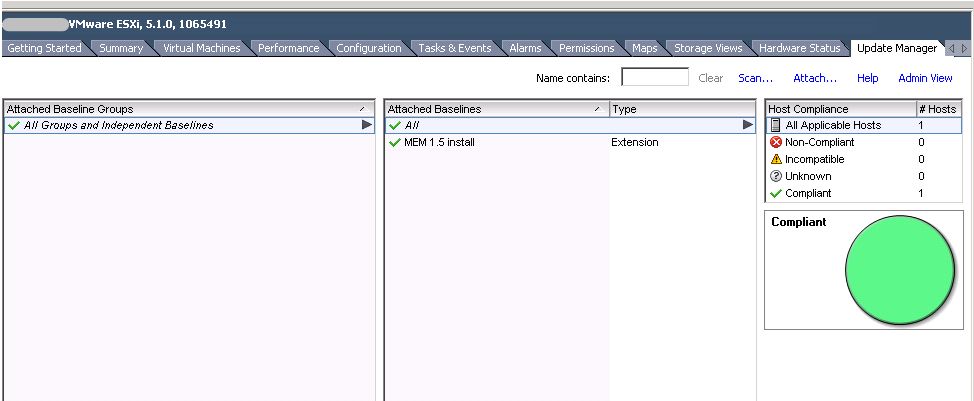
Monitor the recent tasks pane to see the status of the installation. Upon completion, the host will be listed as compliant in the update manager tab.

compliant


Reboot.

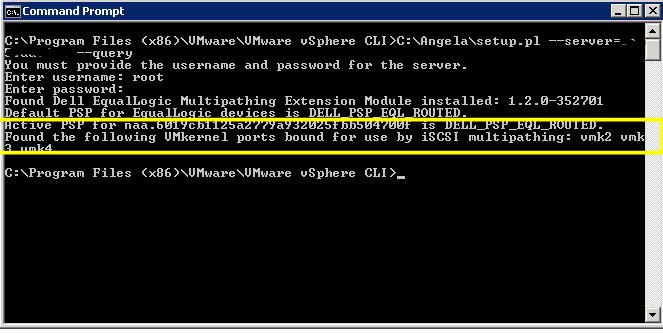
From a system with vMware vSphere CLI installed on it, run the following command to verify the MEM installation. You will need the setup.pl script in order to run it. It’s included in the MEM download.

Enter the following command using your esxi hostname or IP:
# setup.pl --server=esxhostname_or_IP --query

Enter the credentials for the host. After a few moments, the command will display the version of the MEM installed, the default PSP that is now set as well as the vmkernal ports used by MEM.
verifymem

To list the new Dell EQL PSP as well as the defaults, use the following command:

# esxcli --server esxhostname_or_IP storage nmp psp list

Enter the credentials for the host.
listpsps

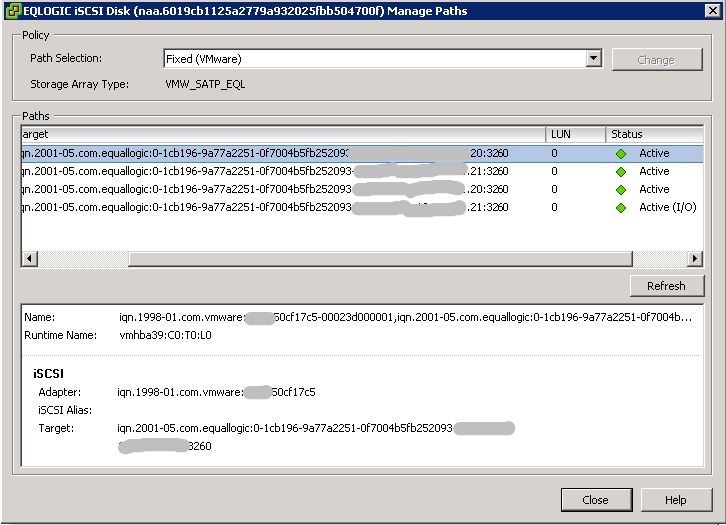
Multipathing is available immediately after installation. You can see the paths to the disk as well as the new PSP. On the host, go to the configuration tab+ hardware+storage+right-click the datastore + properties+ managed paths.

after-paths

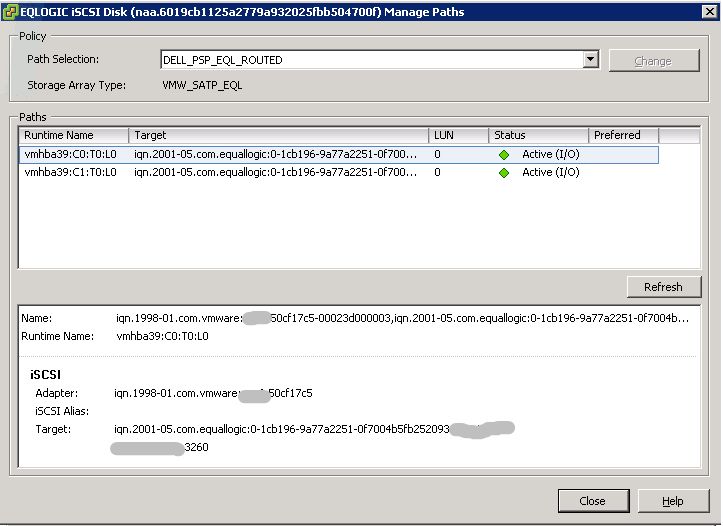
This is what it looked like before the install:

before-paths

Here you can see that there were 2 active connections to each controller, however, only 1 was being used for I/O. Once MEM is installed, there are redundant active connections to each controller and the load is more evenly balanced.

As I mentioned before, the MEM is totally functioning, however, in order to use the new esxcli commands that are available to manage and report on, you’ll have to restart the hostd agent on the esxi host.

Enable SSH on your host and log into it.

Restart the hostd service:

# /etc/init.d/hostd restart

restart-hostd

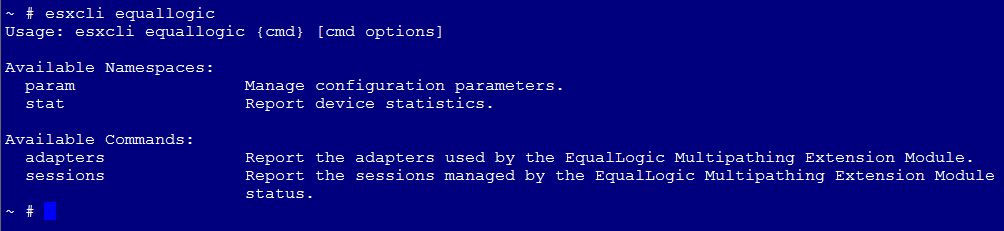
The new commands are now available. To list them:
# esxcli equallogic

eql-cmds

Log out of the host and disable SSH.

Done!
For more information on Dell’s MEM, read this great blog post from Cormac Hogan of vMWare.

Deploy Equallogic’s Virtual Storage Manager (VSM)

Equallogic has a great appliance that you can deploy to vSphere and use to provision datastores to your cluster, create smart copies, replicas and clones as well as configure replication. Equallogic Virtual Storage Manager (VSM) is a must have if you have storage running on either a PS or FS array.  The latest version of VSM, v3.5.3 supports vSphere 5.5.

To deploy a new VSM appliance:

Download the latest OVA (v.3.5.3), release notes, installation and user guides, from equallogic’s website.

Download VSM
Download VSM appliance

Using the vSphere client (not the web client), confirm the vCenter managed IP is set. This will ensure that VSM can identify and communicate the vCenter.

Administration + vSphere server settings + Runtime Settings. Confirm that vCenter’s IP and FQDN is listed, if not, add them.

vCenter Runtime Settings

Time to deploy:

Click on File + Deploy OVF template. The deploy OVF template launches. Browse to the OVA file you downloaded. The appliance will need 15GB of space if thick provisioned (2.2GB if thin).

Click Next twice. Accept the EULA twice. Click next.

Deploy OVF
Browse to the OVA
  • Name the appliance as it should appear in vCenter. Select an inventory location, click next.

Name the VSM appliance

  • Select the host/cluster on which the appliance should run. Click next.
  • Select a resource pool, click next. Select the datastore, click next.
  • Choose a disk format. Thick provisioned is a good choice. Click next.
  • If prompted to select a network where the NIC should be attached, choose it from the drop down and click next.

VSM Properties:

vsm properties

Enter the values as required and click next.

  • FQDN hostname
  • Time zone
  • NTP servers
  • vCenter http and https ports
  • vCenter username
  • vCenter password
  • Default gateway
  • DNS servers
  • IP address
  • Netmask

Review the settings. Click the check box next to power off after deployment and click finish. Close the ‘completed successfully’ dialog box.

View the task & events tab on the vsm appliance to check the status. Look for the “VSM server starting up” entry. This confirms the appliance is ready.

vsm server starting

Review the summary tab of the VM. Do not update VMware tools on the appliance. This just means that the VMware updated tools after the appliance was released. You can safely ignore the out of date tools status.

vsm summary tab

Enable the VSM plug-in:

Click on Plug-ins + Manage Plug-ins. Right click on the VSM plug-in and click enable.

plugins

Enable Plug-in

Close plug-in manager & confirm that Dell EqualLogic VSM is listed under solutions & applications.

under home

When the appliance is deployed successfully, click close and launch the VSM console.

The default credentials are root/eql

Change the default password:

VSM cli

Select 1 + Select 4

Enter a new root password. Press enter to return to main menu.

Configuring VMware vSphere Storage APIs for Storage Awareness (VASA)

For more info on VASA, read Cormac Hogan’s blog post.

Select 3 to configure VASA

configure vasa

Press enter to continue and restart your vSphere client.

Launch VSM:

Click on Home and launch VSM & log in with your vSphere admin credentials.

Launch VSM

login

These are the vCenter credentials you use to log into the client.

Configure Storage Network (optional):

Click the configure VSM properties icon in the toolbar.

configure vsm in gui

Enable the 2nd nic in the VSM server and configure it with an IP on your iSCSI subnet. You’ll have to already have a port group configured to see that subnet or else, the enabled check will be grayed out. *Note*The storage network can only be configured from the gui. This is a setting that cannot be set from the CLI.

cfg-storagenw

Click OK to close. You’ll be prompted to restart. Restart the vSphere client as well. When the VSM server is back up (see console), enable the plug-in.

Add a PS series group:

Click Groups in the navigation pane. Under the getting started tab, click Add PS series group.

Add PS group

In the add PS series group box, enter the group name or IP and credentials (I suggest using grpadmin). Click add and OK.

add-ps-creds

Monitor recent tasks to see when it’s complete.

add-ps-tasks

You’re done.

Deploy a VDP appliance and Migrate VDR restore points

Looks like my new vSphere 5.1 cluster upgrade is coming along swimmingly. Time to get these VMs backed up and the old restore points accessible. Enters VDP

VDP is VMware’s newest VM backup and recovery solution that is supported for vSphere 5.1. As before, it’s integrated with vCenter and can be managed via the vSphere web client. It comes in 2 flavors and depending on the flavor, you get your choice of duplication store sizes, 1/2 Tb, 1TB and 2TB in the Basic version and many more choices in the Advanced version. Data is deduplicated across all backup jobs and utilizes change block tracking and VADP to lighten the load on your ESXi hosts and keeps that backup window much shorter, but only capturing the blocks that have changed. Works with both the Windows and Linux appliance vCenter.

Here are the steps I took to deploy my VDP appliance as well as migrate the restore points from VDR.

Scenario:

I had 1 VDR appliance that backed up both Windows and Linux VMs in 4.1, just with separate dedupe stores. To back up all windows VMs I configured a 900GB disks target and a 500GB disk for Linux.  Since one appliance can only contain 1 disk, I will deploy 2 appliances, (1) .5TB and (1) 1TB. Take a look at the VDP Admin guide for more details on how to size, configure, etc.

Prerequisite:

  • A disk presented to your esxi hosts that are of a large enough capacity to hold the dedupe store, OS, logs, checkpoints, etc. It must be formatted for VMFS-5.
  • Download the appliance from vmware’s website.

Deploy VDP appliance:

  • Launch vSphere web client. From Home, click on vCenter > Datacenter > Objects Tab > Actions Icon > Deploy OVF Template
  • Browse to the downloaded OVA appliance file and click next.
  • Review the details and click next.
  • Accept the EULA and click next.
Review Deploy Details
  • Enter the name of the appliance and select a folder or datacenter in which to deploy it to.
  • Select a resource where to run  the template and click next.
  • Select a datastore that has sufficient space then select a  virtual disk format. Thin Provisioned is best to begin with. You can convert to thick once the VM is deployed, otherwise  the deploy may fail. Click next.
Select Datastore and disk format
  • Select the network the appliance will run on and click next.
  • Enter the IP and DNS information and click next.
IP and DNS  values
Enter IP and DNS info
  • Review the details, click the check box next to power on and click finish.
review template settings
Review your settings
  • To check the status of the deploy, review recent tasks. When the template is powered up, point your supported browser to https://IP_OR_Hostname:8543/vdp-configure
  • Log in with username: root password:changeme
Login to configure
Log in to configure VDP
  • On the welcome screen, click next.
  • Confirm the network settings are correct and click next.
Confirm or edit network settings
Confirm or edit network settings.
  • Select your timezone, click next.
  • Enter your new root password. It must follow all of the listed criteria and cannot be more than 9 characters, 9 exactly! (so weird) Click next.
Enter your new root password for VDP
  • Enter your vCenter information:
    • vCenter service account username
    • Password
    • FQDN or IP
    • If you’re running vCenter on a non-default port, change it here.
    • Check the box next to use vCenter for SSO authentication.
    • Click test connection, if successful, click ok then finish.
  •  Click Restart Now to reboot the appliance. The restart may take ~30 minutes. Monitor it’s progress from the console and when the blue “Welcome” screen is up you can proceed. Be warned, you may be back in ‘install mode’ instead of ‘maintenance mode’ after the appliance come back online. I thought it was me, but there are people out there that had to go through process more than once.  If you’re back at the configuration wizard, just humor it and answer all the questions again.

vdp-welcome

View the Maintenance Interface

  • Launch the appliance. Once configured, it’s now on it’s maintenance interface. Point your browser to https://VDPIP_or_Hostname:8543/vdp-configure/
  • When the system health check completes, view the status of the appliance. From page 24 of the VDP admin guide explains what the maintenance interface is used for.
    • “Viewing Status”—Allows you to see the services currently running (or currently stopped) on the VDP Appliance.
    • “Starting and Stopping Services” —Allows you to start and stop selected services onthe VDP Appliance.
    • “Collecting Logs”—Allows you to download current logs from the VDP Appliance.
    • “Changing vSphere Data Protection Configuration ”—Allows you to view or change network settings, configure vCenter Registration, or to view or edit system settings (timezone information and vSphere Data Protection credentials).
    • Rolling Back an Appliance” —Allows you to restore the VDP Appliance to an earlier known and valid state.
    • “Upgrading the vSphere Data Protection Appliance” —Allows you to upgrade ISO images on your vSphere Data Protection Appliance.
  • *Note* Maintenance services will be stopped for the first 24-48 hours after deployment. This is so your 1st backup window is uninterrupted by maintenance activities.

Migrate Restore Points

  • Point browser to https://VDPIP_or_HOSTNAME:8543/vdp-migration and log in with your VDP root password.
  • Click Attach VDR. This takes some time and will depend on the size of your backup set size.

attach-vdr

You can select the jobs you like to keep and edit the retention. This takes a very long time so be patient.

migrate

VMware KB on migrating restore points

Keeping VDR around for restores

Officially, VDR is not supported in 5.1, however, if you have the plug-in for VDR in vCenter, you can do restores. It’s best to do a restore rehearsal and never overwrite the existing VM. It’s recommended to keep VDR and VDP on separate hosts and to keep VDR powered off until you need to do a restore. If you’re using DRS, just create a rule that will separate virtual machines. This way, they won’t wind up on the same host by mistake.

When powering on a VMA template- Cannot initialize property ‘vami.netmask0.vSphere_Management_Assistant…has no associated network protocol profile.

I’m new to 5.1 and I’m chugging along, getting my new cluster up and running. Deploying a template was a walk in the park in 4.1. This is where you find out you don’t know what you don’t know.

Problem

When I power on the VMA template I get this error:


VM Power-On Error

This is caused by not having created an IP Pool for your vAPPS. What is an IP Pool you say?  Here is an explanation from the vSphere 5.1 online documentation:

IP pools provide a network identity to vApps. An IP pool is a network configuration that is assigned to a network used by a vApp. The vApp can then leverage vCenter Server to automatically provide an IP configuration to its virtual machines.

Solution

You’ll have to configure an IP Pool in order to get your template powered on. Click on the Datacenter in vSphere client. There is a new tab called IP Pools, click on it to configure a pool.

IP Pool Tab

Click Add. The New IP Pools Properties box appears.  Give the pool a name. Depending on which version of IP you’re using, click on the corresponding tab.

New IP Pool Properties

Enter the subnet and gateway information as it pertains to your environment. I did not check Enable IP pool and you may or may not have to depending on your environment. Click on the DNS tab and configure DNS as needed. Go through the other tabs and configure them as they apply. Since I’m only using IPv4 without DHCP, it requires limited config. Click OK when you’re finish.

ippool-finish

You should now be able to power on your VMA template.

Similar information can be found here:


Social media & sharing icons powered by UltimatelySocial