Category: Uncategorized

VMworld 2015 in the books

I’m coming off another vmworld and this one was pretty good. This year, we were back in San Fransisco at the Moscone Center. There were plenty great sessions, engaging speakers, opportunities to meet up with folks from past vmworld’s, networking, vendor parties and the party in AT&T park was the icing on the cake. The VWoman session was really enlightening as usual, but it was the same time as the hall crawl and it was not easy to blow that off. I really don’t like that they put both up against each other. It’s like they wanted the men to have the hall crawl all to themselves. #fail

One key highlight was seeing a woman I met at VMworld 2 years ago present a session this year. Sonya Ryherd from Cox Automotive did a session with her colleague, Chris Nakagaki, called, Introduction to Monitoring the Public Cloud with vRealize Operations Manager. They did a great job. It was one of those sessions where you walked away knowing something you didn’t know before. I was very intrigued and learned even more about what vRealize Operations could do. I’m installing it ASAP!

It’s very invigorating to walk away from the conferences with a renewed sense of direction and passion in what I do. Along with finding out about the new technologies and direction they’re headed, you discover features, flings, tips and tools that you’ve never knew existed. That’s like finding the prize in the cracker jack box. You knew it was there, but you didn’t know what that little gem would be.

The 1st things I’ll do when I get back to the office.

  • Plan for the upgrade to vSphere 6.0.
  • Upgrade tools to v10 before the sphere upgrade.
  • Deploy my ESXi lab in the cloud using Ravello & get ready for the VCP6 exam in 2016.
  • Install our newly purchased vRealize Operations

All in all,  a really good time this year, dare I say the best VMworld yet for me.  I ate at a number of wonderful restaurants:

  • The Cavalier
  • Flour + Water
  • Shalimar
  • Brenda’s Soul Food
  • Green Papaya (not wonderful, but I got my sushi fix)
  • Chipotle (like, who doesn’t eat here when at VMworld?)
  • Scoma’s
  • Ghirardelli’s

I won some cool swag:

  • Signed Tour de France jersey
  • $40 VMworld store gift card
  • 2 Starbuck’s gift cards
  • FitBit HR

And got plenty of t-shirts and swag to drag back to the east coast.

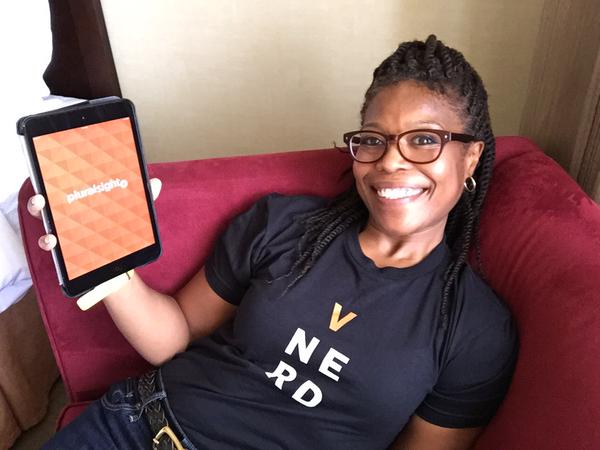
I have a ton of photos, but I’ll post just one.

A great way to end a day at VMworld

One sad note about the conference….I’m sad that It’ll be in Las Vegas next year, but I’ll try to be there. I’m not a woman that likes Hades very much.

See you next year (maybe)!

Deploy Equallogic’s Virtual Storage Manager (VSM)

Equallogic has a great appliance that you can deploy to vSphere and use to provision datastores to your cluster, create smart copies, replicas and clones as well as configure replication. Equallogic Virtual Storage Manager (VSM) is a must have if you have storage running on either a PS or FS array.  The latest version of VSM, v3.5.3 supports vSphere 5.5.

To deploy a new VSM appliance:

Download the latest OVA (v.3.5.3), release notes, installation and user guides, from equallogic’s website.

Download VSM
Download VSM appliance

Using the vSphere client (not the web client), confirm the vCenter managed IP is set. This will ensure that VSM can identify and communicate the vCenter.

Administration + vSphere server settings + Runtime Settings. Confirm that vCenter’s IP and FQDN is listed, if not, add them.

vCenter Runtime Settings

Time to deploy:

Click on File + Deploy OVF template. The deploy OVF template launches. Browse to the OVA file you downloaded. The appliance will need 15GB of space if thick provisioned (2.2GB if thin).

Click Next twice. Accept the EULA twice. Click next.

Deploy OVF
Browse to the OVA
  • Name the appliance as it should appear in vCenter. Select an inventory location, click next.

Name the VSM appliance

  • Select the host/cluster on which the appliance should run. Click next.
  • Select a resource pool, click next. Select the datastore, click next.
  • Choose a disk format. Thick provisioned is a good choice. Click next.
  • If prompted to select a network where the NIC should be attached, choose it from the drop down and click next.

VSM Properties:

vsm properties

Enter the values as required and click next.

  • FQDN hostname
  • Time zone
  • NTP servers
  • vCenter http and https ports
  • vCenter username
  • vCenter password
  • Default gateway
  • DNS servers
  • IP address
  • Netmask

Review the settings. Click the check box next to power off after deployment and click finish. Close the ‘completed successfully’ dialog box.

View the task & events tab on the vsm appliance to check the status. Look for the “VSM server starting up” entry. This confirms the appliance is ready.

vsm server starting

Review the summary tab of the VM. Do not update VMware tools on the appliance. This just means that the VMware updated tools after the appliance was released. You can safely ignore the out of date tools status.

vsm summary tab

Enable the VSM plug-in:

Click on Plug-ins + Manage Plug-ins. Right click on the VSM plug-in and click enable.

plugins

Enable Plug-in

Close plug-in manager & confirm that Dell EqualLogic VSM is listed under solutions & applications.

under home

When the appliance is deployed successfully, click close and launch the VSM console.

The default credentials are root/eql

Change the default password:

VSM cli

Select 1 + Select 4

Enter a new root password. Press enter to return to main menu.

Configuring VMware vSphere Storage APIs for Storage Awareness (VASA)

For more info on VASA, read Cormac Hogan’s blog post.

Select 3 to configure VASA

configure vasa

Press enter to continue and restart your vSphere client.

Launch VSM:

Click on Home and launch VSM & log in with your vSphere admin credentials.

Launch VSM

login

These are the vCenter credentials you use to log into the client.

Configure Storage Network (optional):

Click the configure VSM properties icon in the toolbar.

configure vsm in gui

Enable the 2nd nic in the VSM server and configure it with an IP on your iSCSI subnet. You’ll have to already have a port group configured to see that subnet or else, the enabled check will be grayed out. *Note*The storage network can only be configured from the gui. This is a setting that cannot be set from the CLI.

cfg-storagenw

Click OK to close. You’ll be prompted to restart. Restart the vSphere client as well. When the VSM server is back up (see console), enable the plug-in.

Add a PS series group:

Click Groups in the navigation pane. Under the getting started tab, click Add PS series group.

Add PS group

In the add PS series group box, enter the group name or IP and credentials (I suggest using grpadmin). Click add and OK.

add-ps-creds

Monitor recent tasks to see when it’s complete.

add-ps-tasks

You’re done.

Adding space to a vDisk on a PERC 5/i Controller Part 3 of 3

To Grow the C:\ Drive

This is part 3 of the “Adding space to a vDisk on a PERC 5/i Controller” post.

Back to Part 1 or Part 2.

Growing the system partition is a much more elaborate task. Download gparted (do not use 0.15.0, it’s buggy) and burn the ISO to disk. Make sure you have a full system backup before performing any disk modifications. Yes, that means YOU if this a production system.

Reboot the system with the gparted ISO in the drive. Press the enter key when you get to the boot screen. Follow remaining prompts to get you to the GUI. When asked which mode do you prefer, press 0 then enter.

gparted-1

  • Review the partitions and the familiarize yourself with your disk layout. Note which partition is the boot partition. For Windows, that is your C:\ drive. In this example, C:\ is /dev/sda2 and D:\ is inside the extended partition, /dev/sda5
  • Now this is where it gets tricky. Here I shrunk the /dev/sda5 partition from the left to add space to the beginning of the partition. Then I shrunk /dev/sda3 (the extended partition). Lastly, I grew the C:\ drive partition, /dev/sda2.

gparted-resize

gparted-resize2

gparted-resize3

gparted-resize4

  • Notice the several unallocated slices between the partitions, these occur when you have cylinder aligned and MiB aligned partitions on the same disk. Also, notice the unallocated space at the end of the partition (like when we started) this will taken care of in Windows, however we could handle it hear, but it seems quicker to do from the OS.
  • Once your partitions appear as you like them to, click Apply. This will queue up all 3 disk operations to disk. Depending on the size of your disk, this may take some time.
  • Click Details for more information about what’s happening.

gparted-apply

  • Once the operations are complete, click close.

gparted-done

  • Reboot the server and remove the CD.  Your system will run a check disk on C:\ (and maybe D:\). Let it complete and allow the system to boot to windows
  • When your system boots up, open Disk Management and view the newly sized C:\ and D:\. Note the unallocated space still on the end of the drive. Also note, D:\ no longer has a drive letter. Reassign the same drive letter.

diskmgmt-unallocated3

  • Now Run dis part and extend the volume.
  • Enter #List DISK
  • Enter #LIST VOLUME
  • Enter #SELECT VOLUME #
  • Enter #EXTEND. This will take all available space and use it to extend the partition.
  • Reboot the server and allow for another check disk to run. This time it will be for the D:\ drive. Depending on the size of the drive, this may take some time.
  • Once the server reboots, open up disk management and review the disk layout.

diskmgmt-done

Social media & sharing icons powered by UltimatelySocial