Tag: vSphere

Coming down off my VMworld high

This is my 3rd year attending VMworld and each time I walk away with a renewed focus and energy for my virtual infrastructure and what I can do to better manage and improve it. As I’m writing this post, I’m scrolling through my tweets and notes from VMworld and what stands out is that for my organization, VMware has the tools an SMB needs to deploy, monitor, upgrade, backup, administer, BD/DR, and grow its virtual infrastructure with ease.

My schedule was filled with sessions that covered just the things I needed to hear and to use day-one when I’m back in the office. Using the schedule builder as soon as it was available gave me time to make smarter choices and decide where my time should be spent in a more efficient manner. The VMworld app was a life saver! I knew right where I was suppose to be with notification turned on. The social media section keep me abreast of all the #vmworld tweets easily.

Here are my 3 favorite sessions. The sessions that made me want to roll up my sleeves the minute I had a WiFi connection to VPN back into the office and ‘test’ something out.

Here are my top 3 all-around favs from VMworld 2014:

  • The Solutions Exchange Welcome Reception
    • I got to spend a lot of time looking at what vendors are bringing to the virtualization space. Software, products and services that are moving VMware forward as the leader.
    • The Games at the CDW booth were more fun than I expected to have on opening day. The trivia questions were thought provoking and the ‘game show host’ and his assistant really kept us laughing.
    • Free beer & wine.
  • Winning a scooter (razor type) from Ravello and terrorizing the Moscone Center.
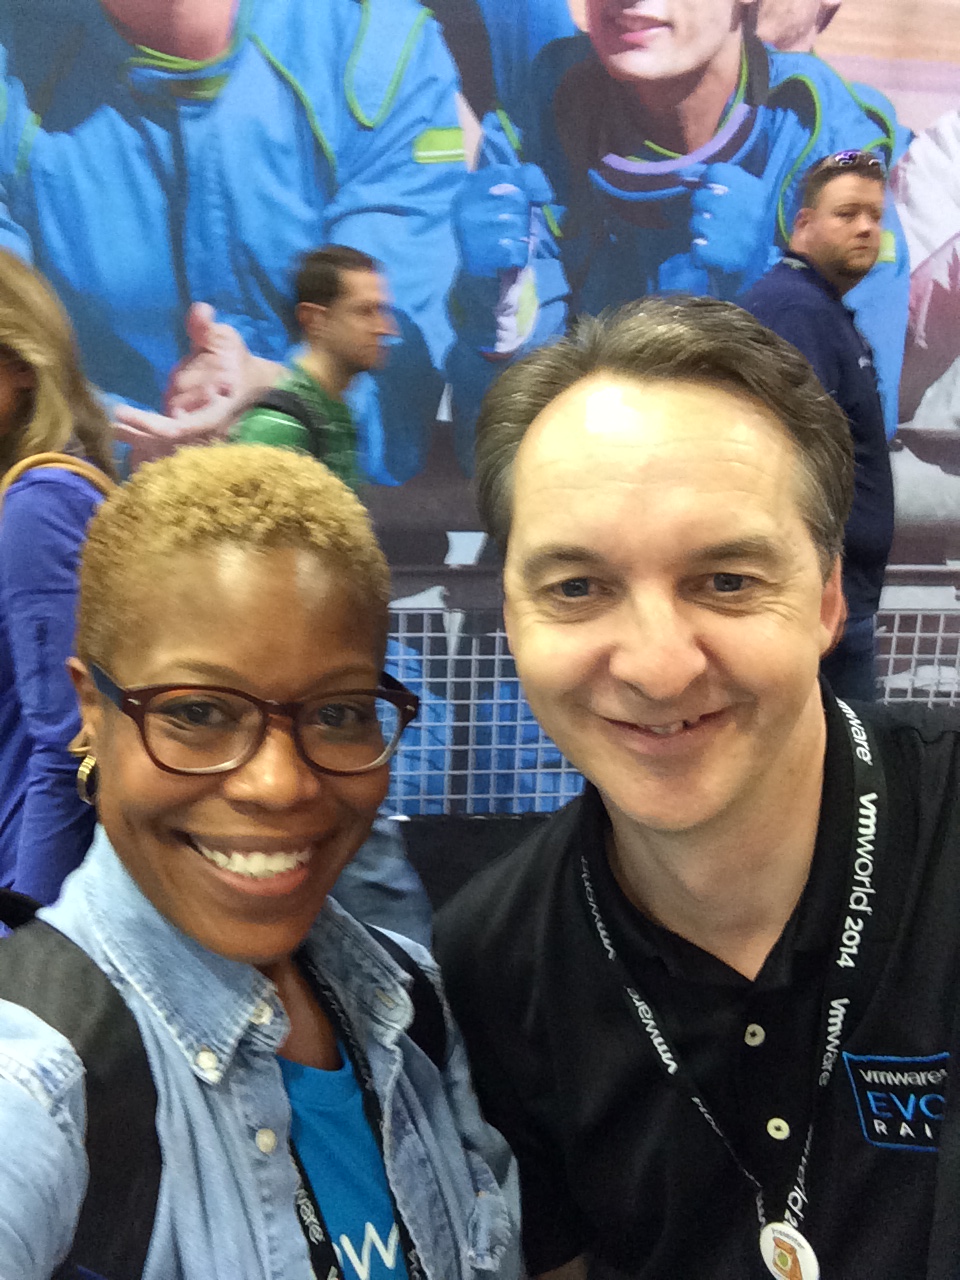
  • Taking a selfie with my SRM mentor, Mike Laverick of VMware.
Me and Mike Laverick of VMware

Here are a few things I would change for next year:

  • The volume of the music at the Monday General Session was deafening. I really didn’t understand why the AV people didn’t rectify that by the end of the keynote. I promised myself I wouldn’t listen to another GS in the Hall D. The hang space was just fine.
  • I was in just ONE session with a woman speaker and I think she was a vendor. ‘Nuff said.
  • I know they’re trying to accommodate those with dietary restrictions, but vegetarians do need protein too.

Now that I’m back in the office, I’m ready to, upgrade to vSphere 5.5, tweak SRM  and  test out the vSphere 6.0 beta. I can’t talk about it (NDA), but you can find out more about it here.

Looking forward to next year.


Deploy Equallogic’s Virtual Storage Manager (VSM)

Equallogic has a great appliance that you can deploy to vSphere and use to provision datastores to your cluster, create smart copies, replicas and clones as well as configure replication. Equallogic Virtual Storage Manager (VSM) is a must have if you have storage running on either a PS or FS array.  The latest version of VSM, v3.5.3 supports vSphere 5.5.

To deploy a new VSM appliance:

Download the latest OVA (v.3.5.3), release notes, installation and user guides, from equallogic’s website.

Download VSM
Download VSM appliance

Using the vSphere client (not the web client), confirm the vCenter managed IP is set. This will ensure that VSM can identify and communicate the vCenter.

Administration + vSphere server settings + Runtime Settings. Confirm that vCenter’s IP and FQDN is listed, if not, add them.

vCenter Runtime Settings

Time to deploy:

Click on File + Deploy OVF template. The deploy OVF template launches. Browse to the OVA file you downloaded. The appliance will need 15GB of space if thick provisioned (2.2GB if thin).

Click Next twice. Accept the EULA twice. Click next.

Deploy OVF
Browse to the OVA
  • Name the appliance as it should appear in vCenter. Select an inventory location, click next.

Name the VSM appliance

  • Select the host/cluster on which the appliance should run. Click next.
  • Select a resource pool, click next. Select the datastore, click next.
  • Choose a disk format. Thick provisioned is a good choice. Click next.
  • If prompted to select a network where the NIC should be attached, choose it from the drop down and click next.

VSM Properties:

vsm properties

Enter the values as required and click next.

  • FQDN hostname
  • Time zone
  • NTP servers
  • vCenter http and https ports
  • vCenter username
  • vCenter password
  • Default gateway
  • DNS servers
  • IP address
  • Netmask

Review the settings. Click the check box next to power off after deployment and click finish. Close the ‘completed successfully’ dialog box.

View the task & events tab on the vsm appliance to check the status. Look for the “VSM server starting up” entry. This confirms the appliance is ready.

vsm server starting

Review the summary tab of the VM. Do not update VMware tools on the appliance. This just means that the VMware updated tools after the appliance was released. You can safely ignore the out of date tools status.

vsm summary tab

Enable the VSM plug-in:

Click on Plug-ins + Manage Plug-ins. Right click on the VSM plug-in and click enable.

plugins

Enable Plug-in

Close plug-in manager & confirm that Dell EqualLogic VSM is listed under solutions & applications.

under home

When the appliance is deployed successfully, click close and launch the VSM console.

The default credentials are root/eql

Change the default password:

VSM cli

Select 1 + Select 4

Enter a new root password. Press enter to return to main menu.

Configuring VMware vSphere Storage APIs for Storage Awareness (VASA)

For more info on VASA, read Cormac Hogan’s blog post.

Select 3 to configure VASA

configure vasa

Press enter to continue and restart your vSphere client.

Launch VSM:

Click on Home and launch VSM & log in with your vSphere admin credentials.

Launch VSM

login

These are the vCenter credentials you use to log into the client.

Configure Storage Network (optional):

Click the configure VSM properties icon in the toolbar.

configure vsm in gui

Enable the 2nd nic in the VSM server and configure it with an IP on your iSCSI subnet. You’ll have to already have a port group configured to see that subnet or else, the enabled check will be grayed out. *Note*The storage network can only be configured from the gui. This is a setting that cannot be set from the CLI.

cfg-storagenw

Click OK to close. You’ll be prompted to restart. Restart the vSphere client as well. When the VSM server is back up (see console), enable the plug-in.

Add a PS series group:

Click Groups in the navigation pane. Under the getting started tab, click Add PS series group.

Add PS group

In the add PS series group box, enter the group name or IP and credentials (I suggest using grpadmin). Click add and OK.

add-ps-creds

Monitor recent tasks to see when it’s complete.

add-ps-tasks

You’re done.

When powering on a VMA template- Cannot initialize property ‘vami.netmask0.vSphere_Management_Assistant…has no associated network protocol profile.

I’m new to 5.1 and I’m chugging along, getting my new cluster up and running. Deploying a template was a walk in the park in 4.1. This is where you find out you don’t know what you don’t know.

Problem

When I power on the VMA template I get this error:


VM Power-On Error

This is caused by not having created an IP Pool for your vAPPS. What is an IP Pool you say?  Here is an explanation from the vSphere 5.1 online documentation:

IP pools provide a network identity to vApps. An IP pool is a network configuration that is assigned to a network used by a vApp. The vApp can then leverage vCenter Server to automatically provide an IP configuration to its virtual machines.

Solution

You’ll have to configure an IP Pool in order to get your template powered on. Click on the Datacenter in vSphere client. There is a new tab called IP Pools, click on it to configure a pool.

IP Pool Tab

Click Add. The New IP Pools Properties box appears.  Give the pool a name. Depending on which version of IP you’re using, click on the corresponding tab.

New IP Pool Properties

Enter the subnet and gateway information as it pertains to your environment. I did not check Enable IP pool and you may or may not have to depending on your environment. Click on the DNS tab and configure DNS as needed. Go through the other tabs and configure them as they apply. Since I’m only using IPv4 without DHCP, it requires limited config. Click OK when you’re finish.

ippool-finish

You should now be able to power on your VMA template.

Similar information can be found here:


Social media & sharing icons powered by UltimatelySocial