Veeam Backup & Replication (VBR) and Enterprise Manager(EM) Version
9.5.0.1038
Windows Version
2016
Veeam Agent for Windows(VAW)
2.0
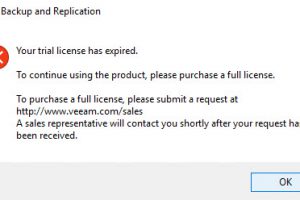
After downloading and installing the Veeam Agent for Microsoft Windows on my workstation and adding the agent to VBR, I scheduled my job and let it run. However, I let the license expire before purchasing one.
Every backup in my vSphere environment stopped backing up on schedule. Manual jobs ran and completed, but nothing would run as scheduled. Here is the proper way of removing the expired license from VBR.
Launch the command prompt as Administratrator and cd to C:\Program Files\Veeam\Backup and Replication\Enterprise Manager. Enter:
You’ll be prompted to continue the license removal, press y.
Next, restart both VBR and EM and verify at all licenses have been removed. Test your jobs by rescheduling one for a few minutes out, once the job runs, the hosts that the VMs run on will begin to re-add themselves to Licensed Hosts.
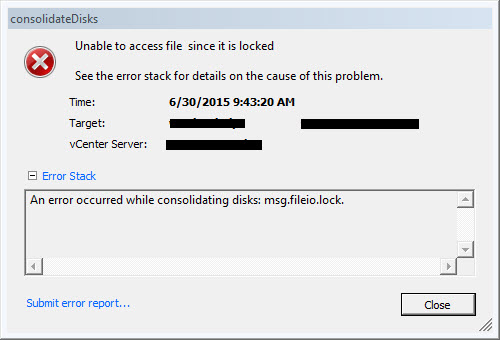
We are running VDP 5.8 on vSphere 5.5. One of the appliances failed to backup a VM last night. Checking the VM in the client, there is a message to consolidate the disks. I attempt to consolidate by right-clicking on the VM > Snapshot > Consolidate and it failed with this error:
I checked the vmware.log file for the VM and saw this error: 2015-09-15T03:00:29.146Z| vcpu-0| I120: DISK: Failed to open disk for consolidate '/vmfs/volumes/5490a09a-eb6682ee-affb-bc305bef5520/mobxxxxxx/mobxxxxxx-000002.vmdk' : Failed to lock the file (16392) 8162
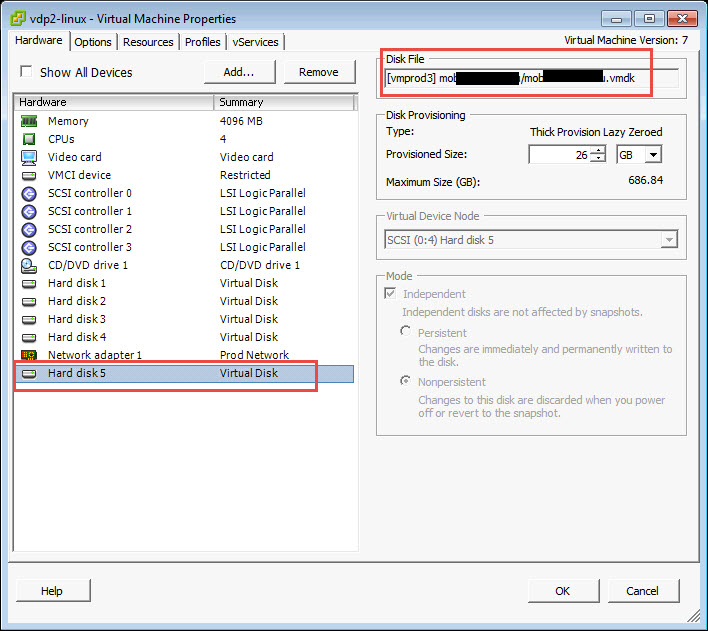
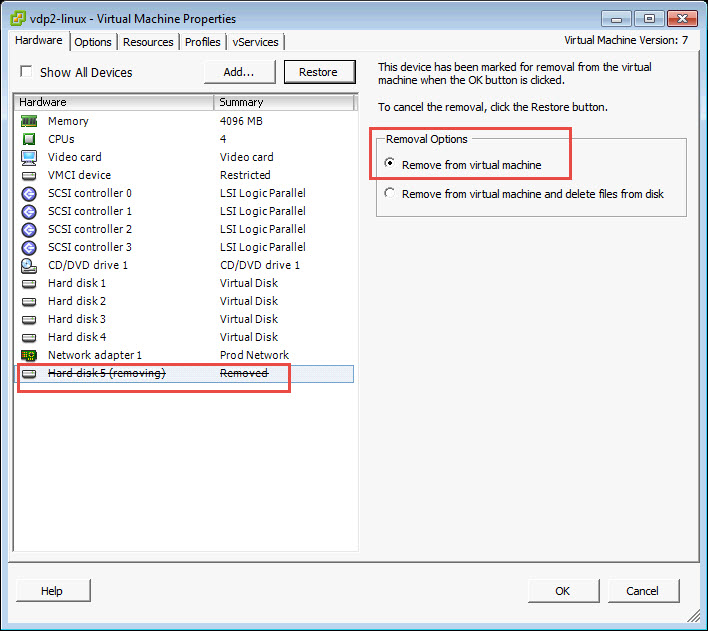
I check the settings on the VDP appliance and notice that the VMDK that belongs to the vm is attached.
Shut down the VDP appliance and remove the disk. Making sure to only remove from virtual machine and NOT remove from virtual machine and delete files from disk.
Run the consolidation and if it succeeds, re-run the VDP backup on out of date sources to remediate your failed backup.
Looks like my new vSphere 5.1 cluster upgrade is coming along swimmingly. Time to get these VMs backed up and the old restore points accessible. Enters VDP
VDP is VMware’s newest VM backup and recovery solution that is supported for vSphere 5.1. As before, it’s integrated with vCenter and can be managed via the vSphere web client. It comes in 2 flavors and depending on the flavor, you get your choice of duplication store sizes, 1/2 Tb, 1TB and 2TB in the Basic version and many more choices in the Advanced version. Data is deduplicated across all backup jobs and utilizes change block tracking and VADP to lighten the load on your ESXi hosts and keeps that backup window much shorter, but only capturing the blocks that have changed. Works with both the Windows and Linux appliance vCenter.
Here are the steps I took to deploy my VDP appliance as well as migrate the restore points from VDR.
Scenario:
I had 1 VDR appliance that backed up both Windows and Linux VMs in 4.1, just with separate dedupe stores. To back up all windows VMs I configured a 900GB disks target and a 500GB disk for Linux. Since one appliance can only contain 1 disk, I will deploy 2 appliances, (1) .5TB and (1) 1TB. Take a look at the VDP Admin guide for more details on how to size, configure, etc.
Prerequisite:
A disk presented to your esxi hosts that are of a large enough capacity to hold the dedupe store, OS, logs, checkpoints, etc. It must be formatted for VMFS-5.
Download the appliance from vmware’s website.
Deploy VDP appliance:
Launch vSphere web client. From Home, click on vCenter > Datacenter > Objects Tab > Actions Icon > Deploy OVF Template
Browse to the downloaded OVA appliance file and click next.
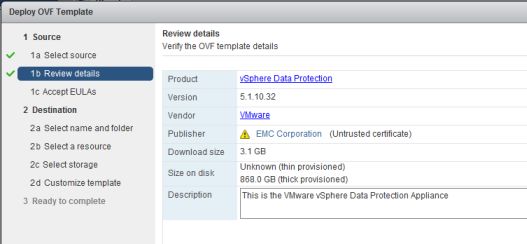
Review the details and click next.
Accept the EULA and click next.
Review Deploy Details
Enter the name of the appliance and select a folder or datacenter in which to deploy it to.
Select a resource where to run the template and click next.
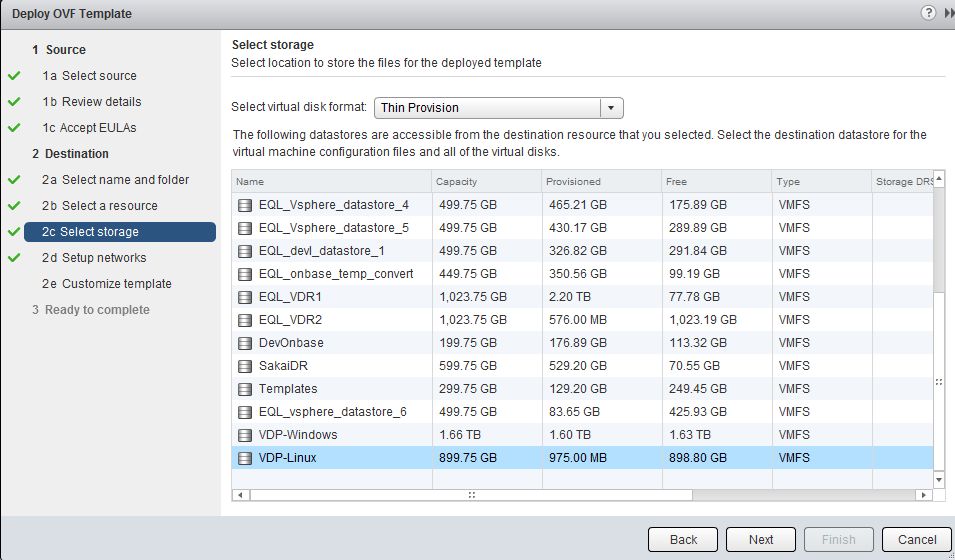
Select a datastore that has sufficient space then select a virtual disk format. Thin Provisioned is best to begin with. You can convert to thick once the VM is deployed, otherwise the deploy may fail. Click next.
Select Datastore and disk format
Select the network the appliance will run on and click next.
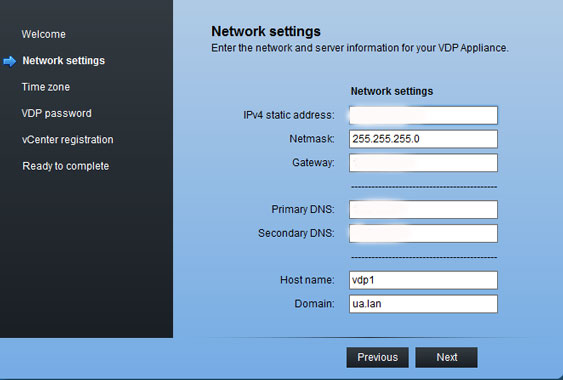
Enter the IP and DNS information and click next.
Enter IP and DNS info
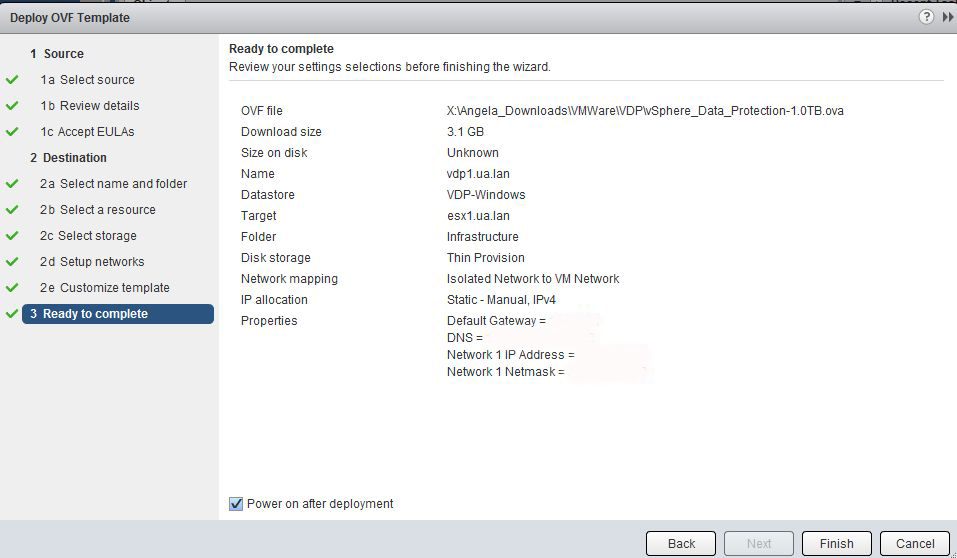
Review the details, click the check box next to power on and click finish.
Review your settings
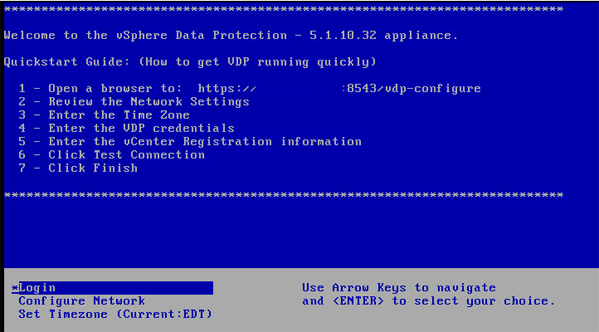
To check the status of the deploy, review recent tasks. When the template is powered up, point your supported browser to https://IP_OR_Hostname:8543/vdp-configure
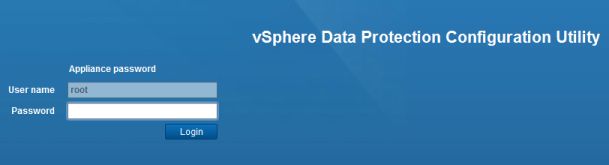
Log in with username: root password:changeme
Log in to configure VDP
On the welcome screen, click next.
Confirm the network settings are correct and click next.
Confirm or edit network settings.
Select your timezone, click next.
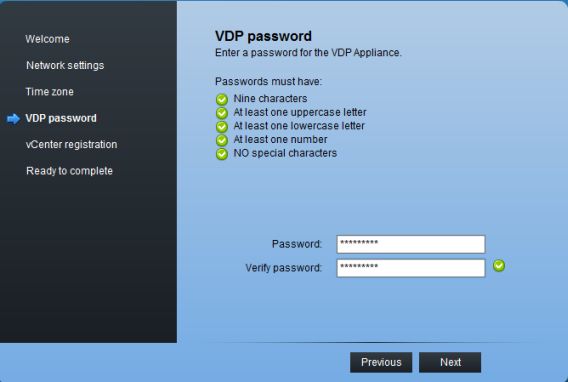
Enter your new root password. It must follow all of the listed criteria and cannot be more than 9 characters, 9 exactly! (so weird) Click next.
Enter your new root password for VDP
Enter your vCenter information:
vCenter service account username
Password
FQDN or IP
If you’re running vCenter on a non-default port, change it here.
Check the box next to use vCenter for SSO authentication.
Click test connection, if successful, click ok then finish.
Click Restart Now to reboot the appliance. The restart may take ~30 minutes. Monitor it’s progress from the console and when the blue “Welcome” screen is up you can proceed. Be warned, you may be back in ‘install mode’ instead of ‘maintenance mode’ after the appliance come back online. I thought it was me, but there are people out there that had to go through process more than once. If you’re back at the configuration wizard, just humor it and answer all the questions again.
View the Maintenance Interface
Launch the appliance. Once configured, it’s now on it’s maintenance interface. Point your browser to https://VDPIP_or_Hostname:8543/vdp-configure/
When the system health check completes, view the status of the appliance. From page 24 of the VDP admin guide explains what the maintenance interface is used for.
“Viewing Status”—Allows you to see the services currently running (or currently stopped) on the VDP Appliance.
“Starting and Stopping Services” —Allows you to start and stop selected services onthe VDP Appliance.
“Collecting Logs”—Allows you to download current logs from the VDP Appliance.
“Changing vSphere Data Protection Configuration ”—Allows you to view or change network settings, configure vCenter Registration, or to view or edit system settings (timezone information and vSphere Data Protection credentials).
Rolling Back an Appliance” —Allows you to restore the VDP Appliance to an earlier known and valid state.
“Upgrading the vSphere Data Protection Appliance” —Allows you to upgrade ISO images on your vSphere Data Protection Appliance.
*Note* Maintenance services will be stopped for the first 24-48 hours after deployment. This is so your 1st backup window is uninterrupted by maintenance activities.
Migrate Restore Points
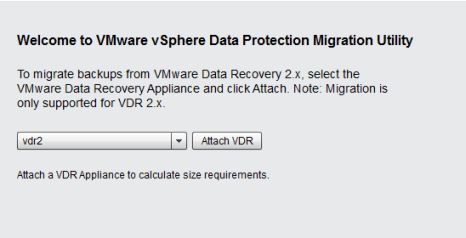
Point browser to https://VDPIP_or_HOSTNAME:8543/vdp-migration and log in with your VDP root password.
Click Attach VDR. This takes some time and will depend on the size of your backup set size.
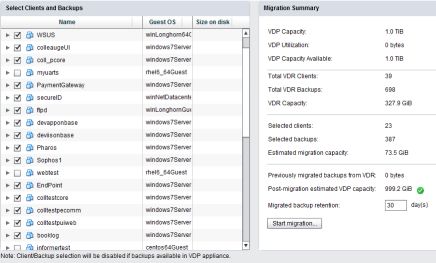
You can select the jobs you like to keep and edit the retention. This takes a very long time so be patient.
Officially, VDR is not supported in 5.1, however, if you have the plug-in for VDR in vCenter, you can do restores. It’s best to do a restore rehearsal and never overwrite the existing VM. It’s recommended to keep VDR and VDP on separate hosts and to keep VDR powered off until you need to do a restore. If you’re using DRS, just create a rule that will separate virtual machines. This way, they won’t wind up on the same host by mistake.