Category: disk partitioning

When you resize the wrong hard disk on a vm

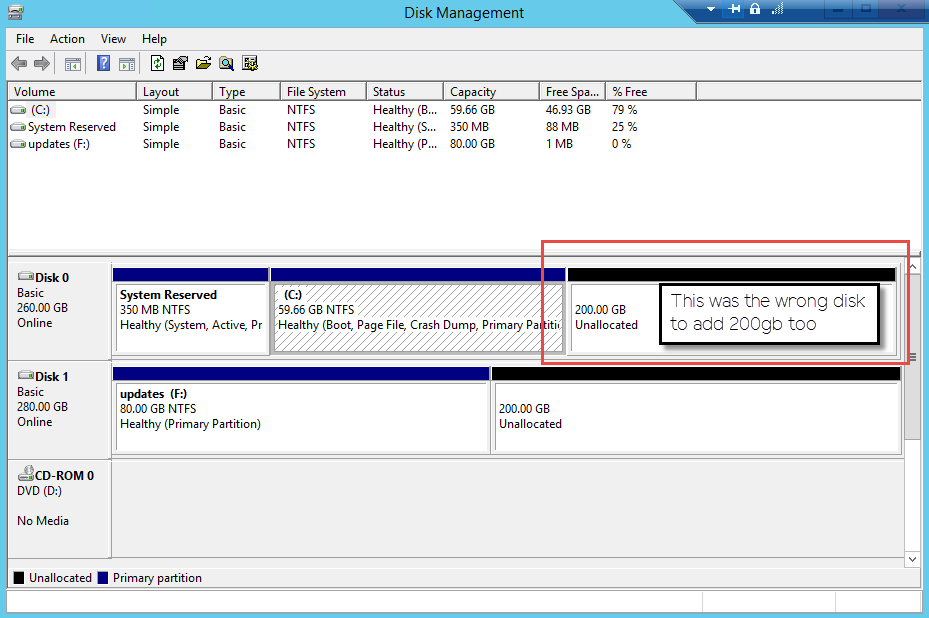
I’m running WSUS on a 2012R2 server and the drive where the updates are tends to grow a lot. On this VM, I increased the provisioned size of the c:\ drive and not the  drive where the updates reside. I didn’t notice I’d touched the wrong disk until I’d rescanned the disks on the VM and saw what I’d done.

260gbdrive


As panic set in, I changed the provisioned size back to 60GB (I know, I know) and well, you know the rest. This article saved me today. I didn’t want to restore the VM unless I really had no choice, this did the trick.

wrongdisk

Power off the VM and identify the host & datastore that the VM resided on, I enabled SSH and browsed to the VM location.

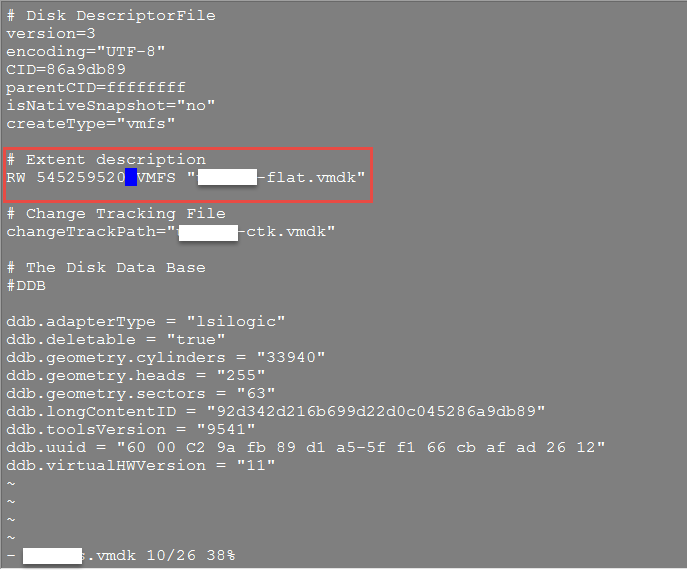
Cat out the descriptor file  (vmname.vmdk) that outlines the data layout on the virtual disk. In the Extend Description section, you’ll see the extent(s) info. Next to RW (if it’s read/write) a number. That number represents the size of the vmdk in sectors, with the additional 200GB included.

extentsize

To change the sector size to reflect the value I’m shrinking the drive back down to, 60GB, calculate it:

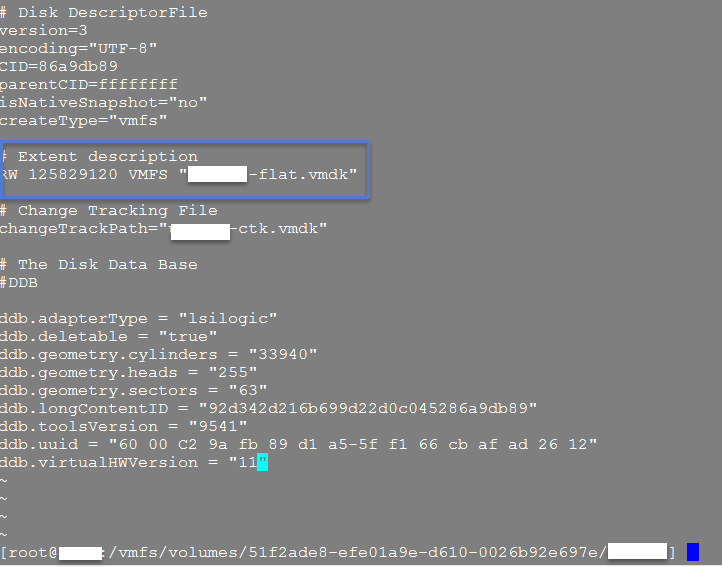
60GB = 60 * 1024 * 1024 * 1024 / 512 = 125829120 sectors

Edit the descriptor file and change the sectors to the new number, save and exit.

newsectorsize.png

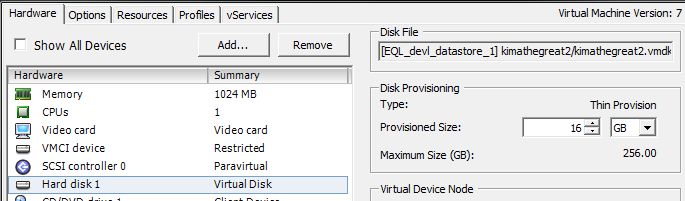
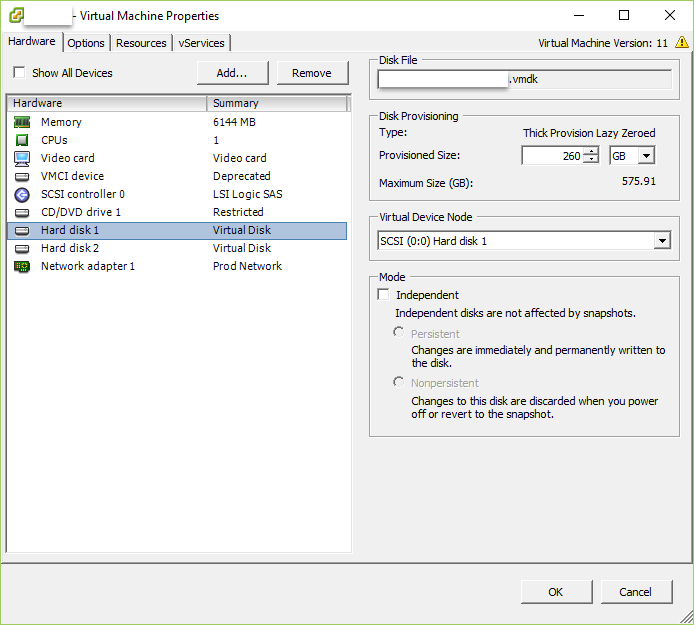
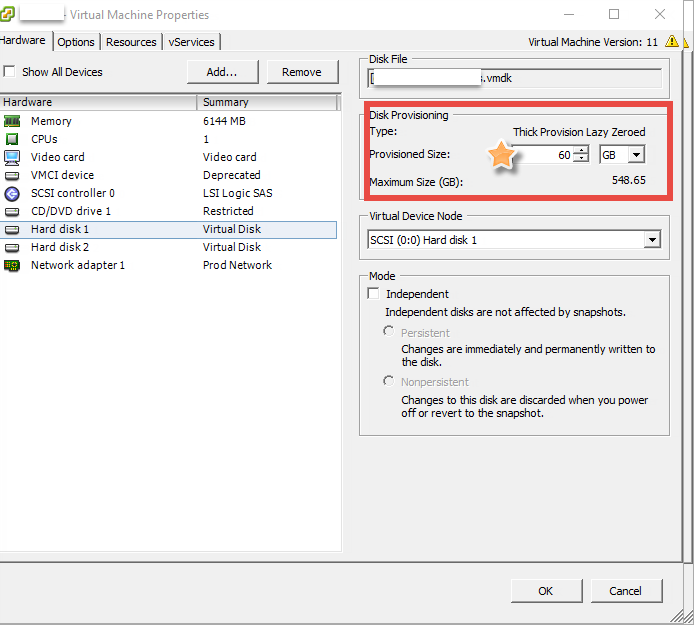
Come out of the directory where the VM resides and VMotion  it to another datastore. Review the settings of the vm and take note of the new and improved disk size.

newsize.png

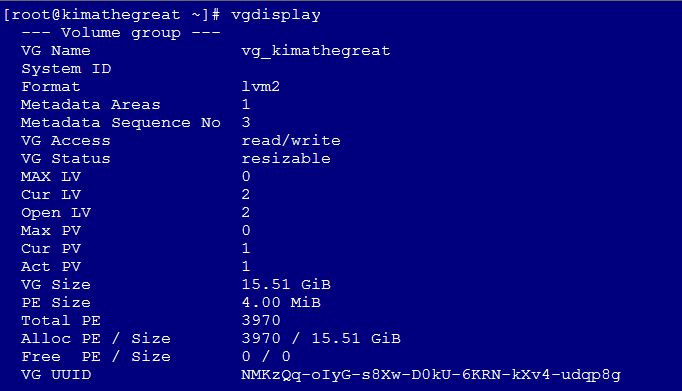
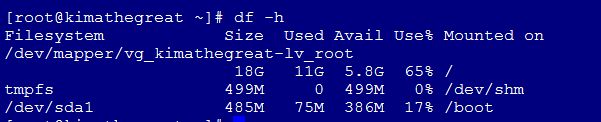
Power on the VM and review the size in Disk Management.

diskmgnt

Now, grow the right disk and try not to ever do that again.


Grow (Extend) an LVM on a Linux VM

We’ve all been there, you’re running an app on a VM and you see that it is quickly running out of free space. Since we’re not constrained by any physical limitation, we can just allocate more space to the guest and grow the disk.

As with any hard drive partitioning, make sure you back up any critical data. Since this is a vm and I’m running VDR, I can run a quick backup and begin. Also, remove any snapshots if you have them.

Power down the VM. Add space to the hard disk under Edit Settings.

Edit Settings on the VM

Power the VM back up  and  run a  # df -Th  to see the current disk usage & filesystem type.

df -h output before growing the disk

Run  # ls -al /dev/sda* to view all the disks

fdisk /dev/sda

:n (new disk)

:p (create primary partition)

:3 (the partition number)

: first cylinder  (keep the defaults)

: p (print the partition table and review the new partition on /dev/sda#)

:w (write the table to disk and exit)

# reboot the server or run  # partprobe . If partprobe throws an error, just reboot. This is to make sure the partition table is actually written.

Run  # vgdisplay to view the volume group. In the FREE PE / Size section, you will see that there isn’t any free space yet. Take note of the proper name of the volume group.

Output from vgdisplay

Run a  #vgextend vg_insertyourvghere /dev/sda#

Do another #vgdisplay to confirm the free space on the volume group.

freespace

It shows you there is now 4GB free space that can be added to the volume group.  Now we extend the logical volume into that free space

Do an #lvdisplay to get the proper name of the logical volume you’re going to extend.

Now, time to extend the logical volume group.

#  lvextend -L +4G /dev/vg_kimathegreat/lv_root

lvextend

I reduced the size slightly to avoid the error about  “Insufficient free space”.

Now to resize the file system. If this is a partition that can be unmounted, run a # umount before running resize2fs.

#resize2fs /dev/vg_kimathegreat/lv_root

Run df -h to see the new size of the partition and the increased free space.

newfreespace

Now, there are a few caveats I’ve run across. Mainly when running fdisk /dev/sda. I will allow me to make a partition, but depending on where the sectors start and end, I won’t be able to run a pvextend.

If that happens, run # cfdisk and see where the partitions are and if you have any free space. If you do, that is where you create your partition.  You can make your corrections, between both fdisk and cfdisk , by deleting the small partition and creating a new one with the larger chunk of free space.  Just be careful and don’t delete anything critical.

As you can see, I’m missing sda3. That was because the 1st fdisk /dev/sda created a partition using only a few megs of space. I didn’t note the sector count and created the primary partition in the smaller block of free space. I used fdisk  (d) to delete that partition and then created a new one.

missingsda3

Social media & sharing icons powered by UltimatelySocial