| CentOS 7.4.1708 | Kernel 3.10.0.-693.11.1.el7.x64_86 |
| Drobo B800i | Firmware 2.0.6 |
The Drobo and the host computer must be on the same subnet in order for this to work. (See Drobo Online User Guide)
Preparation
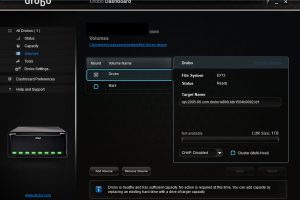
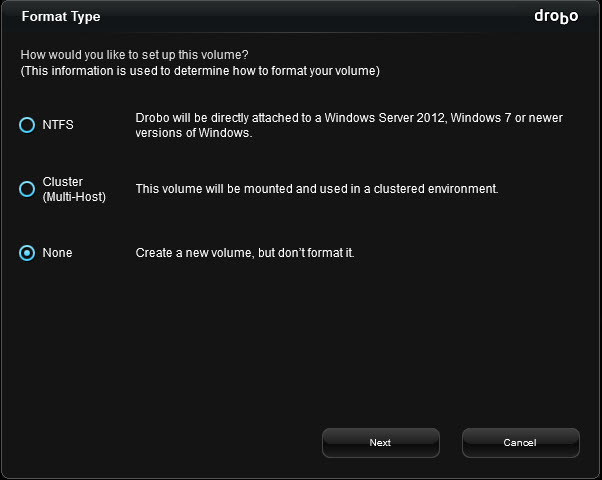
After configuring the device’s IP and other settings via USB from my Windows desktop using Drobo Dashboard, I created a 1TB, unformatted volume.
Information you’ll need to connect to machine:
- Target Name
- IP address of device
I did not enable CHAP, but it can be easily configured on the machine. I also disabled SELinux on this test box.
**note** your Drobo must be on the same subnet as your server.
I installed the iscsi initiator utilities.
$ sudo yum install -y scsi-target-utils
Configure the server
On the CentOS server, install the iscsi package
# yum -y install iscsi-initiator-utils
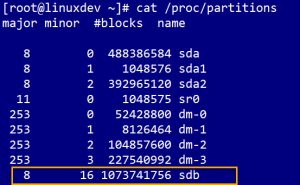
List out the /proc/partitions file to see the devices that you have currently. Once you login to the iSCSI volume, a new one will appear and that’s the one we’ll format.
# cat /proc/partitions
Add the target name to /etc/iscsi/initiatorname.iscsi file, save and exit.
#  vim  /etc/iscsi/initiatorname.iscsi
InitiatorName=iqn.2005-06.com.drobo:b800i.tdb1504b0092.id1
Use the iscsiadm command to discover the target.
# iscsiadm -m discovery -t sendtargets -p 10.253.53.25
Once your volumes are discovered, you can login to them
# iscsiadm -m node -T iqn.2005-06.com.drobo:b800i.tdb1504b0092.id1 -p 10.253.52.25 --login
List out the /proc/partitions file to see the new disk.
# cat /proc/partition
If the login is successful, run the dmesg | tail command to see if the kernel sees the logical blocks.
# dmesg | tail
Time to partition the device.
Run the parted command against the device to create a new disk label. Run It again to create the primary partition
# parted --script  /dev/sdb mklabel msdos
# parted --script  /dev/sdb mklabel primary 0% 100%
If by chance you get an error that reads:
Warning: The resulting partition is not properly aligned for best performance
Read this blog post and make the adjustments. 2048s is a good choice for the starting sector.
Check the disk alignment
# parted /dev/sdb align-check optimal 1
If it returns 1 aligned, you’re good to go.
Format your disk
# mkfs.ext3 /dev/sdb1
*note* I’d read that this Drobo didn’t support ext4 and after formatting the volume, I found that to be false.
Mount your disk
# mount /dev/sdb1 /drobo
Confirm that you can write to it
# touch /drobo/testfile
Check the file system disk space usage.
# df -hT
*Notes & Caveats*
- All volumes on the Drobo were ‘visible’ in file manager. If you have multiple volumes on the target, you’ll see them all in GUI file manager.
- They have a different name after each reboot /dev/sdb1 or /dev/sdc1,
- Adding it to /fstab didn’t matter, since the name changed after every reboot.
- They show as ‘on my computer’ and when I click on the drive, it mounts to /run/media/username/some-really-long-number-and-series-of-letters. The media directory isn’t even present under the/ run director after a reboot. It only appears once I click on the disk in the file manager.
- I’ve read a few blogs where it’s better to present the Drobo as 1 large volume to a Linux system.
- I formatted it as ext3 just fine. I’d read in another blog that it doesn’t support ext4. I didn’t find a definitive answer in the online guide to confirm or deny it until I saw the above mentioned alert in the dashboard.
You can set the target to login and mount at boot by editing the /etc/fstab and by using the iscsiadm command to set it to automatic.
